Product Design Process
16/01/2024
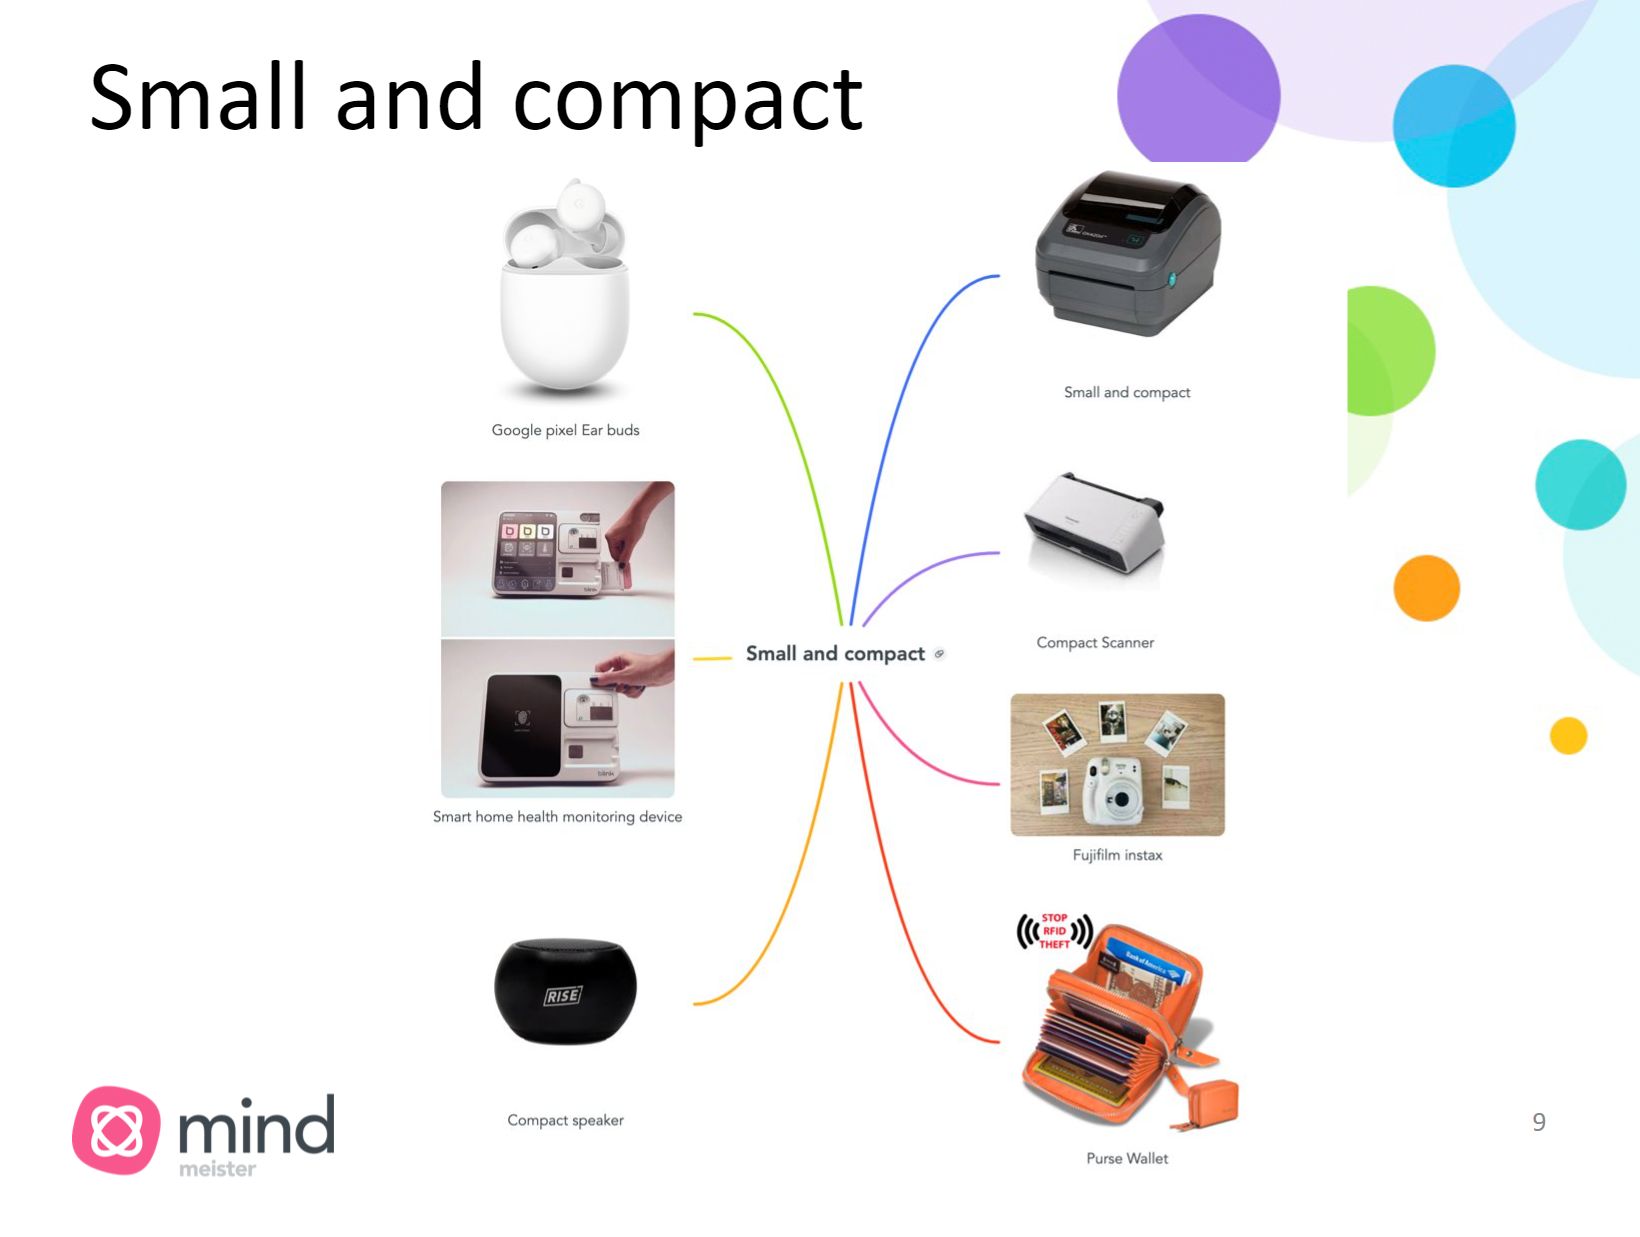
Moodboards
Have you ever wondered how to start with a design? I always mesmerized the rapid product innovations and here is the quick starter for designing. Creating mood boards is best manifestation of the design concepts of various features and parts of our product. A route map for triggering our ideas to innovate and develop the concepts into products. Mapping the features of our product with the things that we see around us is mood board creation. Moodboards with MindMeister
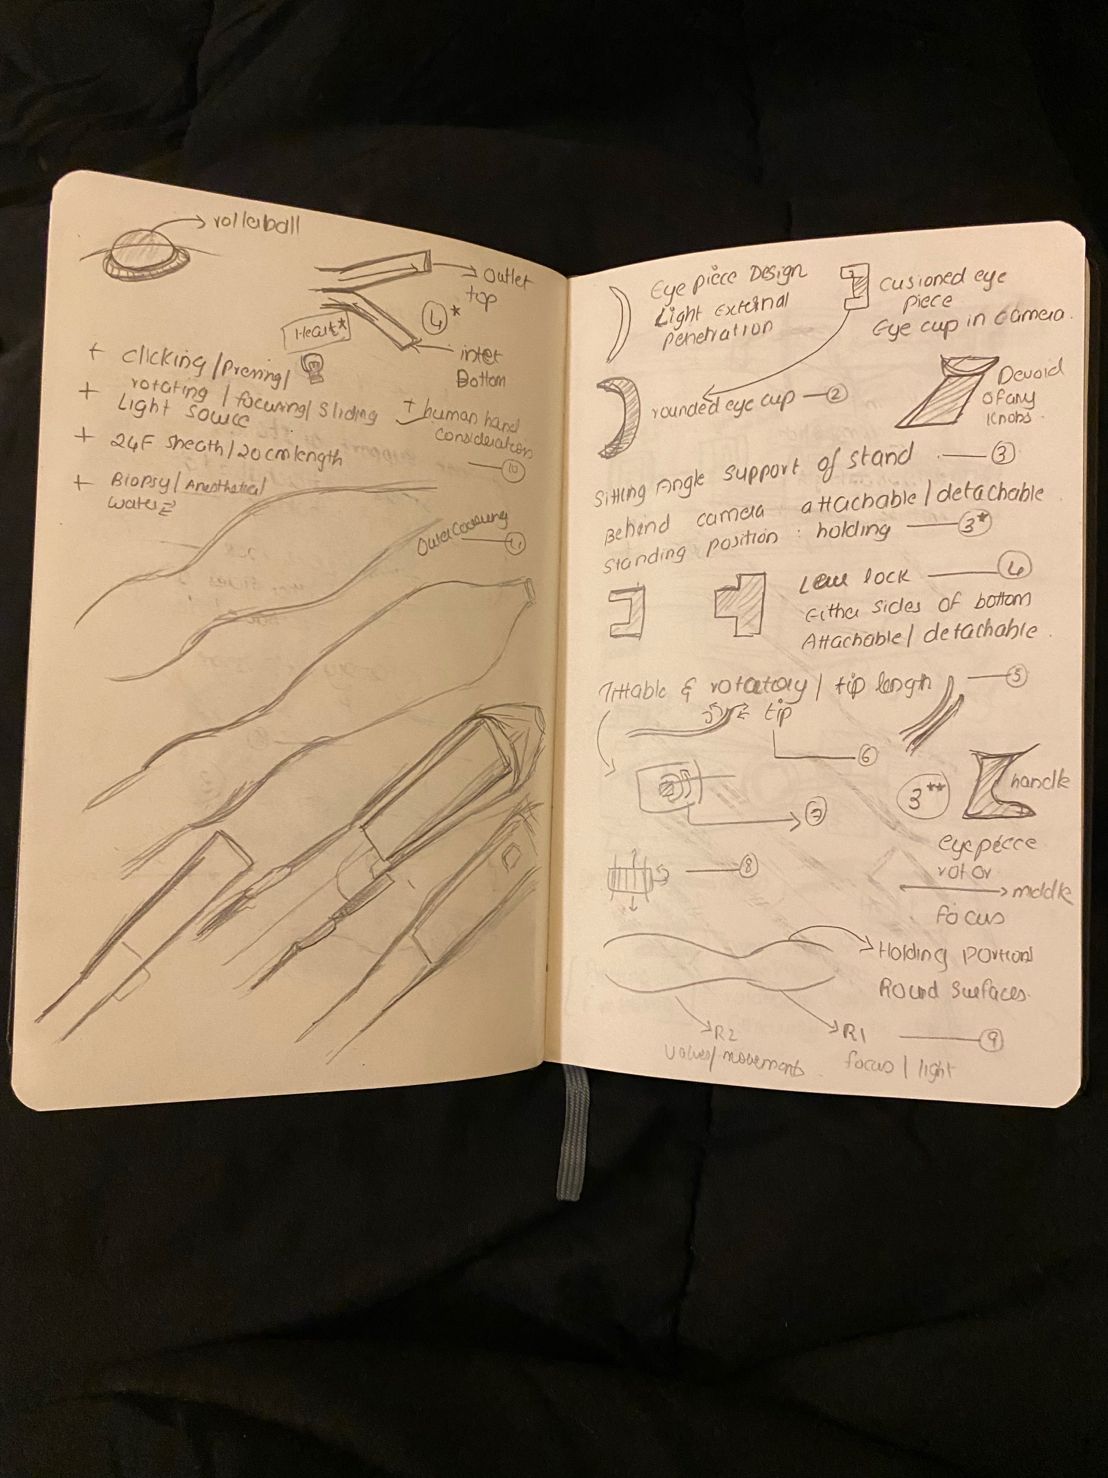
Sketching
Start Simple…Draw what you actually see and not what you persume! Observation is one of the powerful tools for sketching. I began to see the world with an eye of a designer while i started sketching in my routine life. Never ever before I thought of the manufacturing processes or mechanisms of the things around me. Sketching from Orthogonal views and Perspective views to the final product realization sketches made me realize the fact the art is the best form for pitching your ideas and in fact the best marketing tool. Learning the art of sketching was a great learning Gaussian curve at Duke.


Design Considerations#1
With a handful of ideas after sketcking and moodboard creation, one may start sketching concepts that align to the features of their product. It may feel easy going while sketching as imagination are boundless. Promise you!! there would definitely be a tendency to peep into the design tools, but 🛑 , here is someone when not considered before may gulp your design, may bleed at end :) It's a big giant "Design for Manufacture and Assembly". To make it simple, ask two questions, ❓ Can my product be manufactured by the existing manufacturing processes with minimum cost and easiness? Would my Tool maker hit me hard at the backyard when approached with this design :) ❓ Can my product be easily assembled for mass production? Do i want my production unit to take long tiring hours cursing my product! With all boundless design and mechanisms, we all had beautiful sketches and CAD and when it came to the "DFM" class, we literally redesigned for DFM...with all of us at the peak of the Guassian Curve!! For this reason, DFM was the best lesson learnt at Duke! We learnt what NOT to do in design! If DFM was taught before design, this might not be a post to share and never ever going to be a beautiful lesson! "The design considerations must be part of our imaginations and sketching" Next time when we sketch, we all start remembering our giants :)
Design Considerations #2
The Big giants for Design carry magical wands on both hands for making designs overcome manufacturing constraints!! 📍 Understanding the Materials Observe the things around us. The most common materials would be either plastics, metals, alloys or wood. ✨ Fuses insulted by PVC plastics that protects electric circuits from overloaded currents ✨ Ultem resins that provides strength surgical skin stapler ✨ Disposal Syringes made of Polypropylene Why is it important to understand materials? One must design a product foreseeing what would be it be used for. Every material has unique property that make it compatible for certain application, the Biocompatibility property of ultem make it a perfect fit for surgical skin stapler whereas Melting point property of PVC capable of being an insulator for fuses. Visualize the context where your product is being used before choosing the material! 📍 Understanding the Manufacturing Process It takes a lot of efforts to understand the manufacturing processes by imagination. So feel free to watch videos :) Tasting the bitterness of the various manufacturing process and looking around things with a curious bulb eyes of an engineer and pondering "What manufacturing process would have been used in this product??" will make the process a rose petal bed. Some of the fascinating manufacturing processing were Heavy Duty Hammer Forging Process used for making Railway wheels, Rotary Thermoformer for Cargomax trailer, Making Spur Gear From Old Ships High Strength Sheet using machining..
Unlocking the "Product Design" using Fusion 360!
Are design tools used only for communicating our ideas to stakeholders 🤔 "Design tools describes the concepts to the tool makers and manufacturers" When one start peeping into the design tools for showcasing the insights from sketching, here are some perks for you! ✨ Familiarization with 'A' design software is important for beginners..Try to dive deep into using different tools in 'A' software so that your hands may easily fit into other software easily. ✨ Design course trained our young minds with the Autodesk Fusion 360 & Moldflow software. ✨ Insights on using Fusion 360#1 📍 Consider the "Over molding features" of your design before shelling the part. 📍 Shelling requires a minimum dimension and this may limit design curves if not considered early. 📍 Consider the draft angles during your design for making it fit for easy injection molding [DFM].
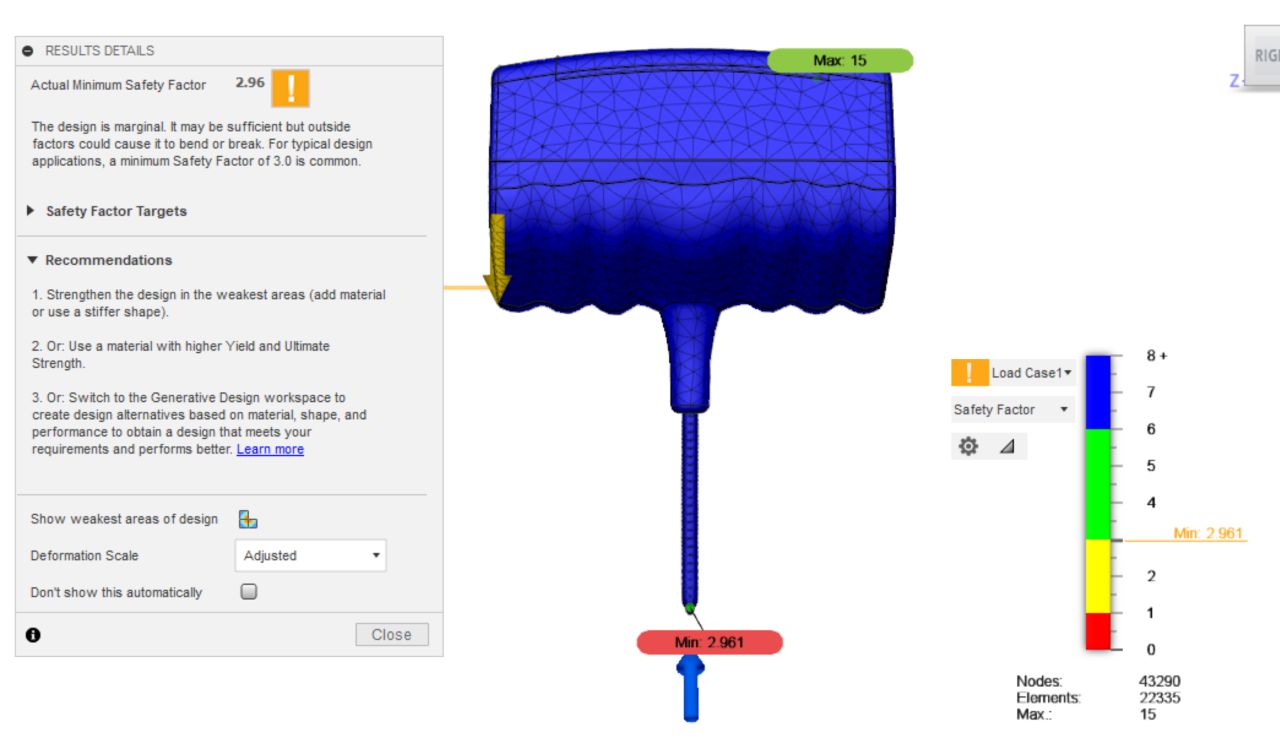
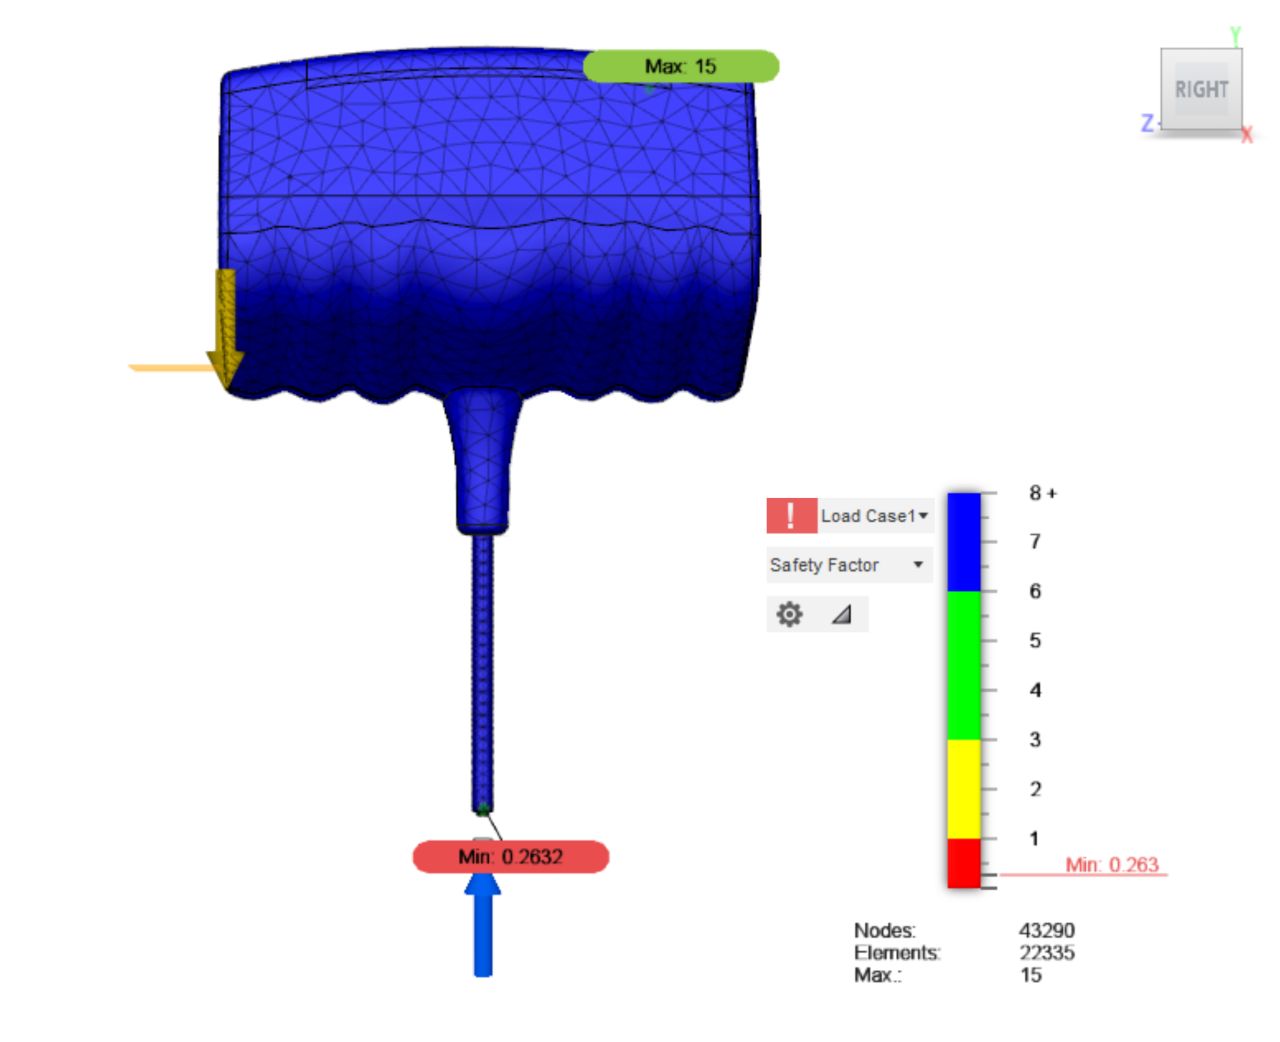
Debugging your Design using Fusion 360!
"Design ➡ Simulation" Here is a Universal Rule 🌎 📍Any "Design" before release has to be tested be it be a Software, Hardware, Mechanical or its integration. Why Simulation 🤔 📍 Helps in validating the design under its best and worse conditions. 📍 In Mechanical context, the product has fewer chances to undergo failure after manufacturing, if tested using simulation. 📍 Application: Helps in determining failures under the maximum force encountered on the designed product. Steps for Simulation 🏁 📍 Autodesk Fusion 360 & Moldflow simulation segment with which one may be able to simulate your design 📍 Choose the materials, load, constrain, region for load and constraint, force value, directions for applying the force 📍 Create a mesh and pretesting the design 📍 Testing the design 🌟 Key Elements of Simulations are Materials, Thickness, Maximum amount of force applied, Load region, Constraint Region and Minimum safety factor. One of the exciting parts of the simulations were the colors generated during the simulation! 💙 🍏 😑 😡


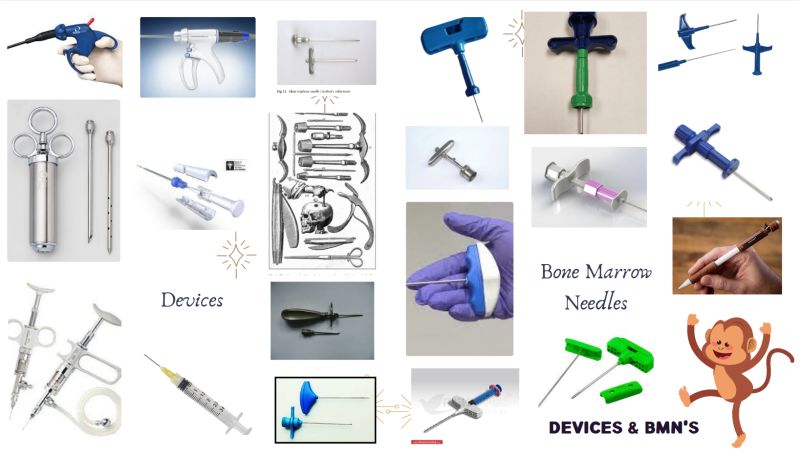
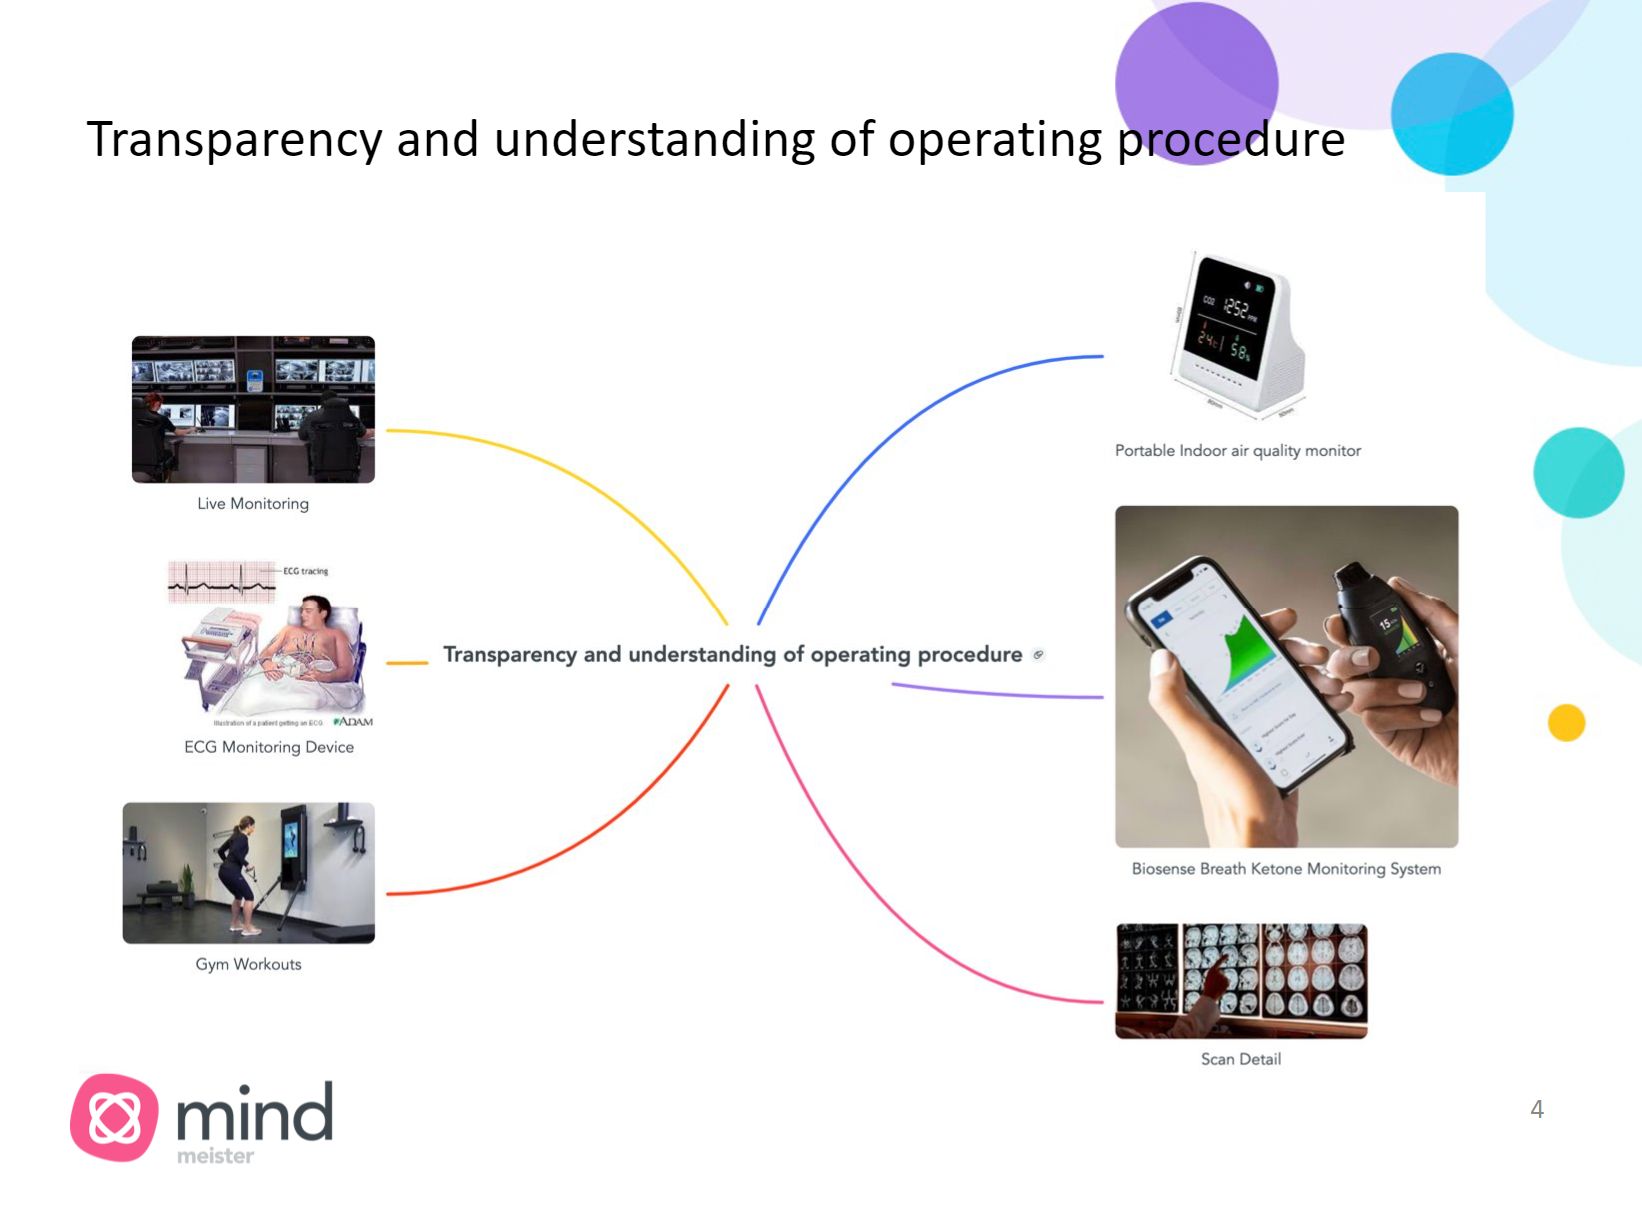
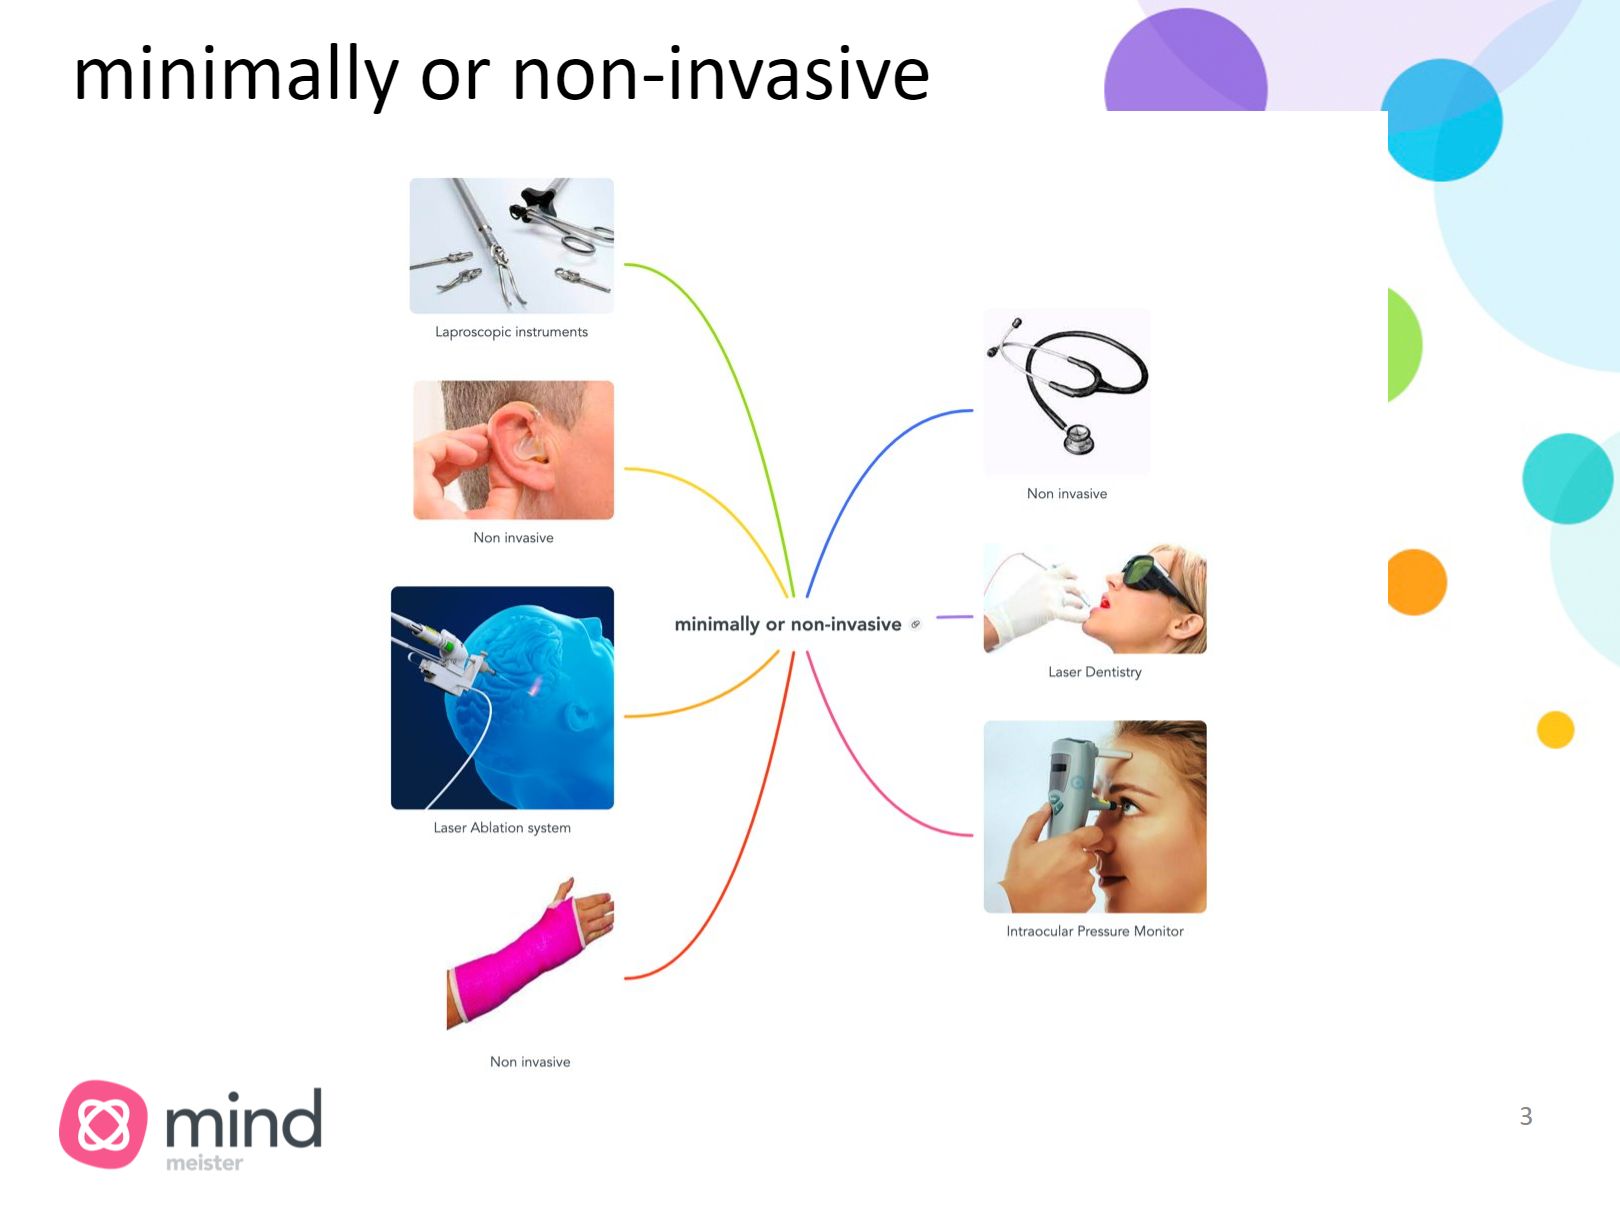
A Journey from Product Design ➡ Product Visualization, Product Showcasing & Product Prototyping
Why Product Visualization is important 🤔 📍 Designing using Ergonomics: Human factors in Engineering and Design would be one of the fundamental lessons taught in all our Engineering curricula. Just because, it is important to know how the user is to handle the designed product. 📍 Designing using Usability principles: Knowledge of the usability of the device gives a different perspective during designing a product. 📍 Product visualization gives the designer insights into how the product would be handled by the user in the actual environment. How can we do Product Visualization 🤔 📍Rendering can be performed in Autodesk Fusion 360 & Moldflow - Rendering provides a 3D model realistic image view of the drawing. - Choosing the appropriate environment for placing the image improves the aesthetics of the design - Options for choosing appropriate lighting and shadowing give the image better contrast. 📍 Environment mimicking in Adobe Photoshop: The rendered image can be edited in photoshop by choosing a real environment such as a healthcare setting or clinic setting or in the hands of a doctor making the product visualization authentic. Animation and Prototyping 😎 📍 Product Showcasing: An additional element of “Animation” would help in showcasing the Product working which would make the design look more "realistic and sellable". 📍 Prototyping: 3D Printing the prototype at Duke Innovation Colab helps us understand the basic structure and size of the product. Prototyping along with visualization can give an overview of the product aesthetics.
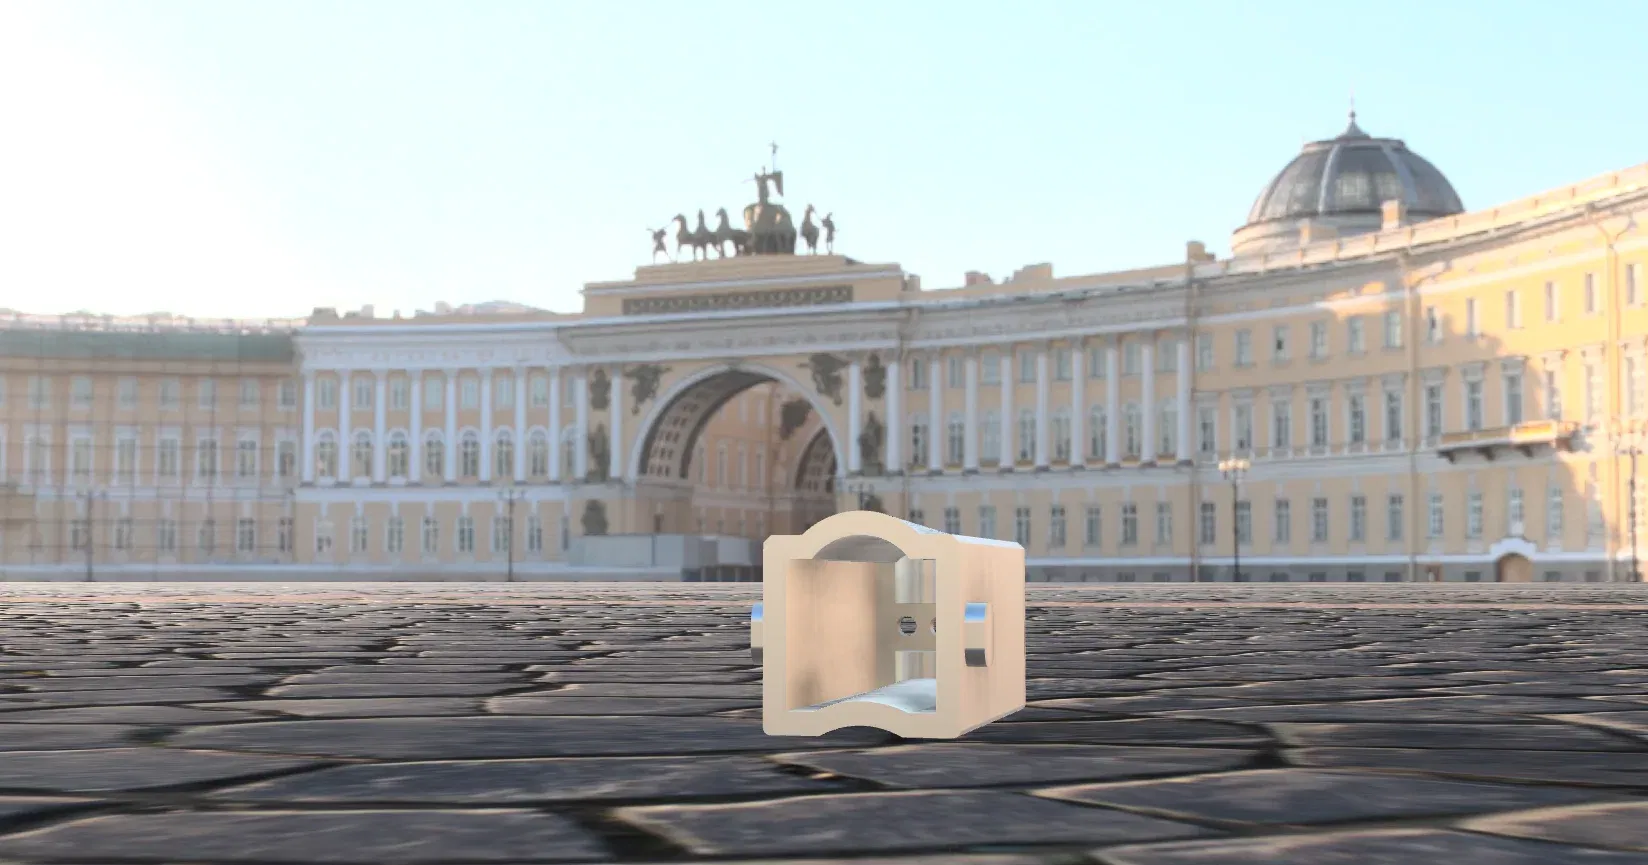
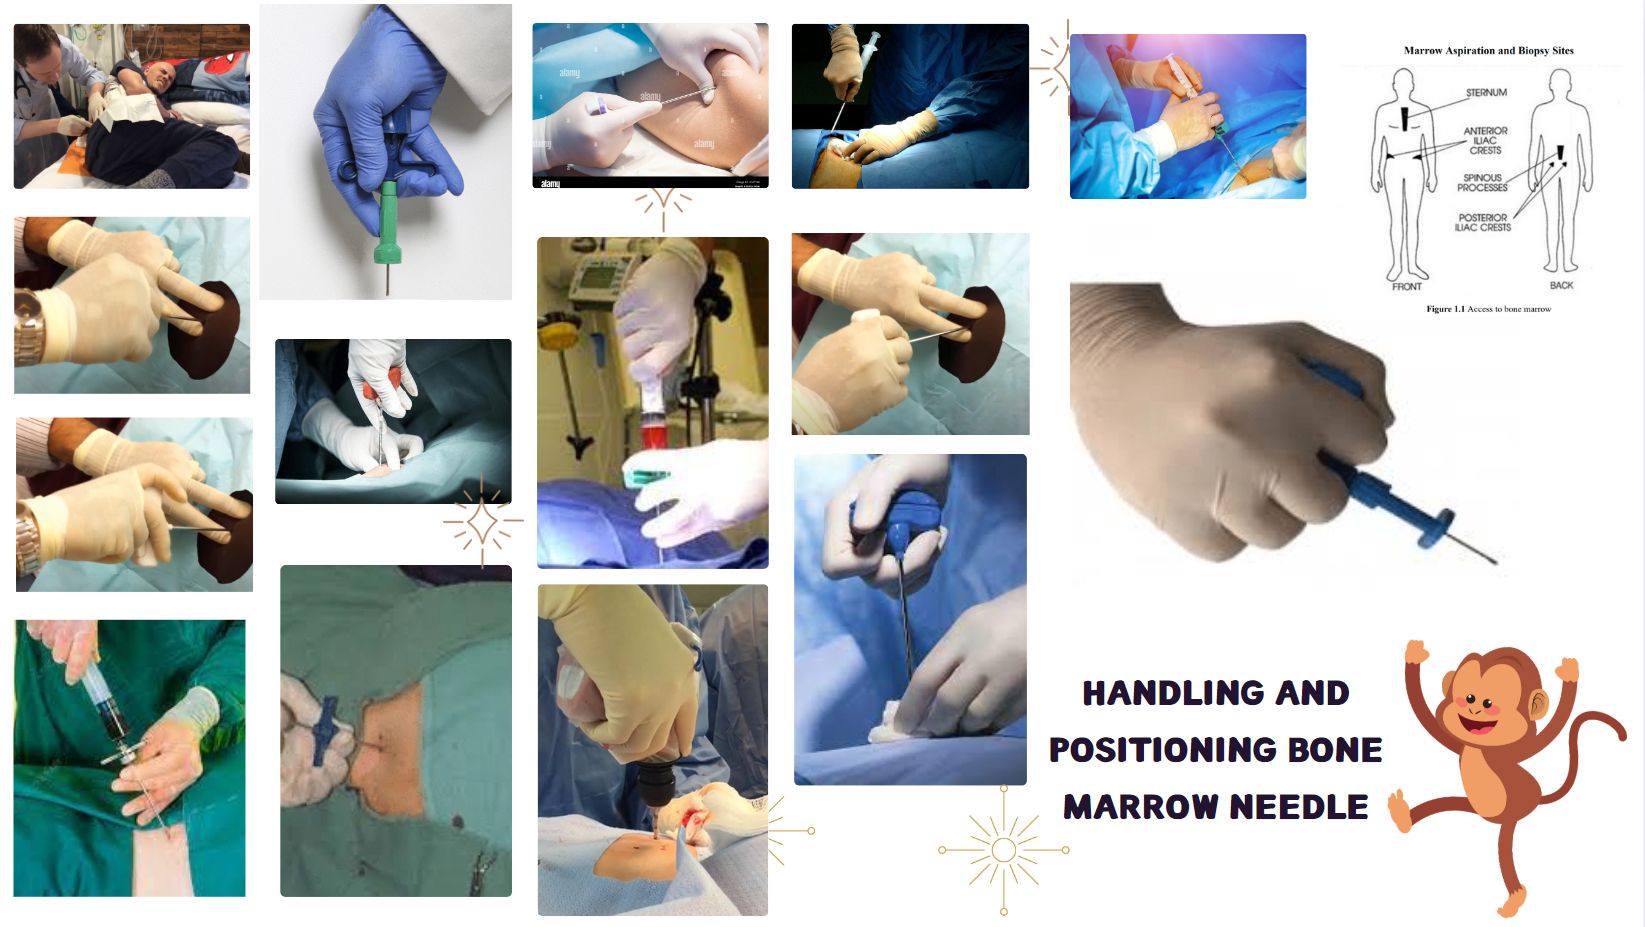
Hold, control, and align using Jigs & fixtures
"Product Showcasing" by R&D team ➡ Approval from the Company Management ➡ Big-Jig "Volume Manufacturing" come into the film role 📽 If we’re successful in our innovation, we going to have to make a lot of them! ~ Prof.Paul For any product to be "Volume manufactured", there comes automation and the use of substantial selection of standard engineering techniques, procedures, and requirements for manufacturing with ease and accuracy. Introducing basic "Big-Jigs" for ease and accuracy that one may always see in a manufacturing site. Manufacturing Tolerance 🤔 📍 When a part has to be replicated 100 times, 1000 times, 100,000 times..there is an existence of unpreventable variation called manufacturing tolerance. 📍 Manufacturing Tolerance is an important tool for manufacturers to achieve the level of precision and consistency required in modern manufacturing. 📍 General Tolerance guidelines: General plastics tolerance: +/- 0.2mm High plastics tolerance: +/- 0.05mm General machining tolerance: +/- 0.25mm High machining tolerance: +/- 0.1mm Uber high machining tolerance: +/- 0.025mm or more Low fidelity 3D printing tolerance: +/- 0.25mm or low High fidelity 3D printing tolerance: ~ +/- 0.1mm Tolerances don’t have to be symmetrical: +0.0 -0.1 is acceptable 📍 "Tolerances can cause interference, misalignment, and all manner of havoc" How things will go together 🤔 📍 While designing a product, it is important to consider how these pieces are going to be put together and build sufficient clearance/ allowance for manufacturing tolerances. 📍 Design tools using Autodesk Fusion 360 & Moldflow: Counterbore + Through Hole + Pilot Hole + Upstanding rib + Tongue/groove + Ghost split line/ false split lines Jigs 🤔 📍 Jigs ensure accuracy, repeatability, quality, and manufacturability. 📍 Jig is a type of tool used to control the location or motion of another tool. Fixtures 🤔 📍 Fixtures ensure the position, orientation, or location of the workpiece. 📍 Fixture is a support holding device used to hold work in place. Volume Manufacturing Validation 🤔 📍The US FDA Quality System Regulation defines process validation as follows: “Process validation means establishing by objective evidence that a process consistently produces a result or product meeting its predetermined specifications.” Now what if I asked you to do it 100 times, 1000 times, 100,000 times????
